Wizard Step 1: Basics
In the app, this step is the Basics step of Create Campaign or Edit campaign (opened from the campaigns area).
- New campaign: start Create campaign from the campaigns list or equivalent entry point.
- Edit draft: open an existing draft from the list or a link your admin shares.
- Copy from an existing campaign: when available, pick a source campaign so settings can copy over; you still walk through the wizard.
- Start from a template: when available, select a template on this step; defaults load after the template is applied (see below).
The page title is Create Campaign or Edit campaign. The subtitle explains the six steps (basics → telephony → audience → schedule → outcomes → review).
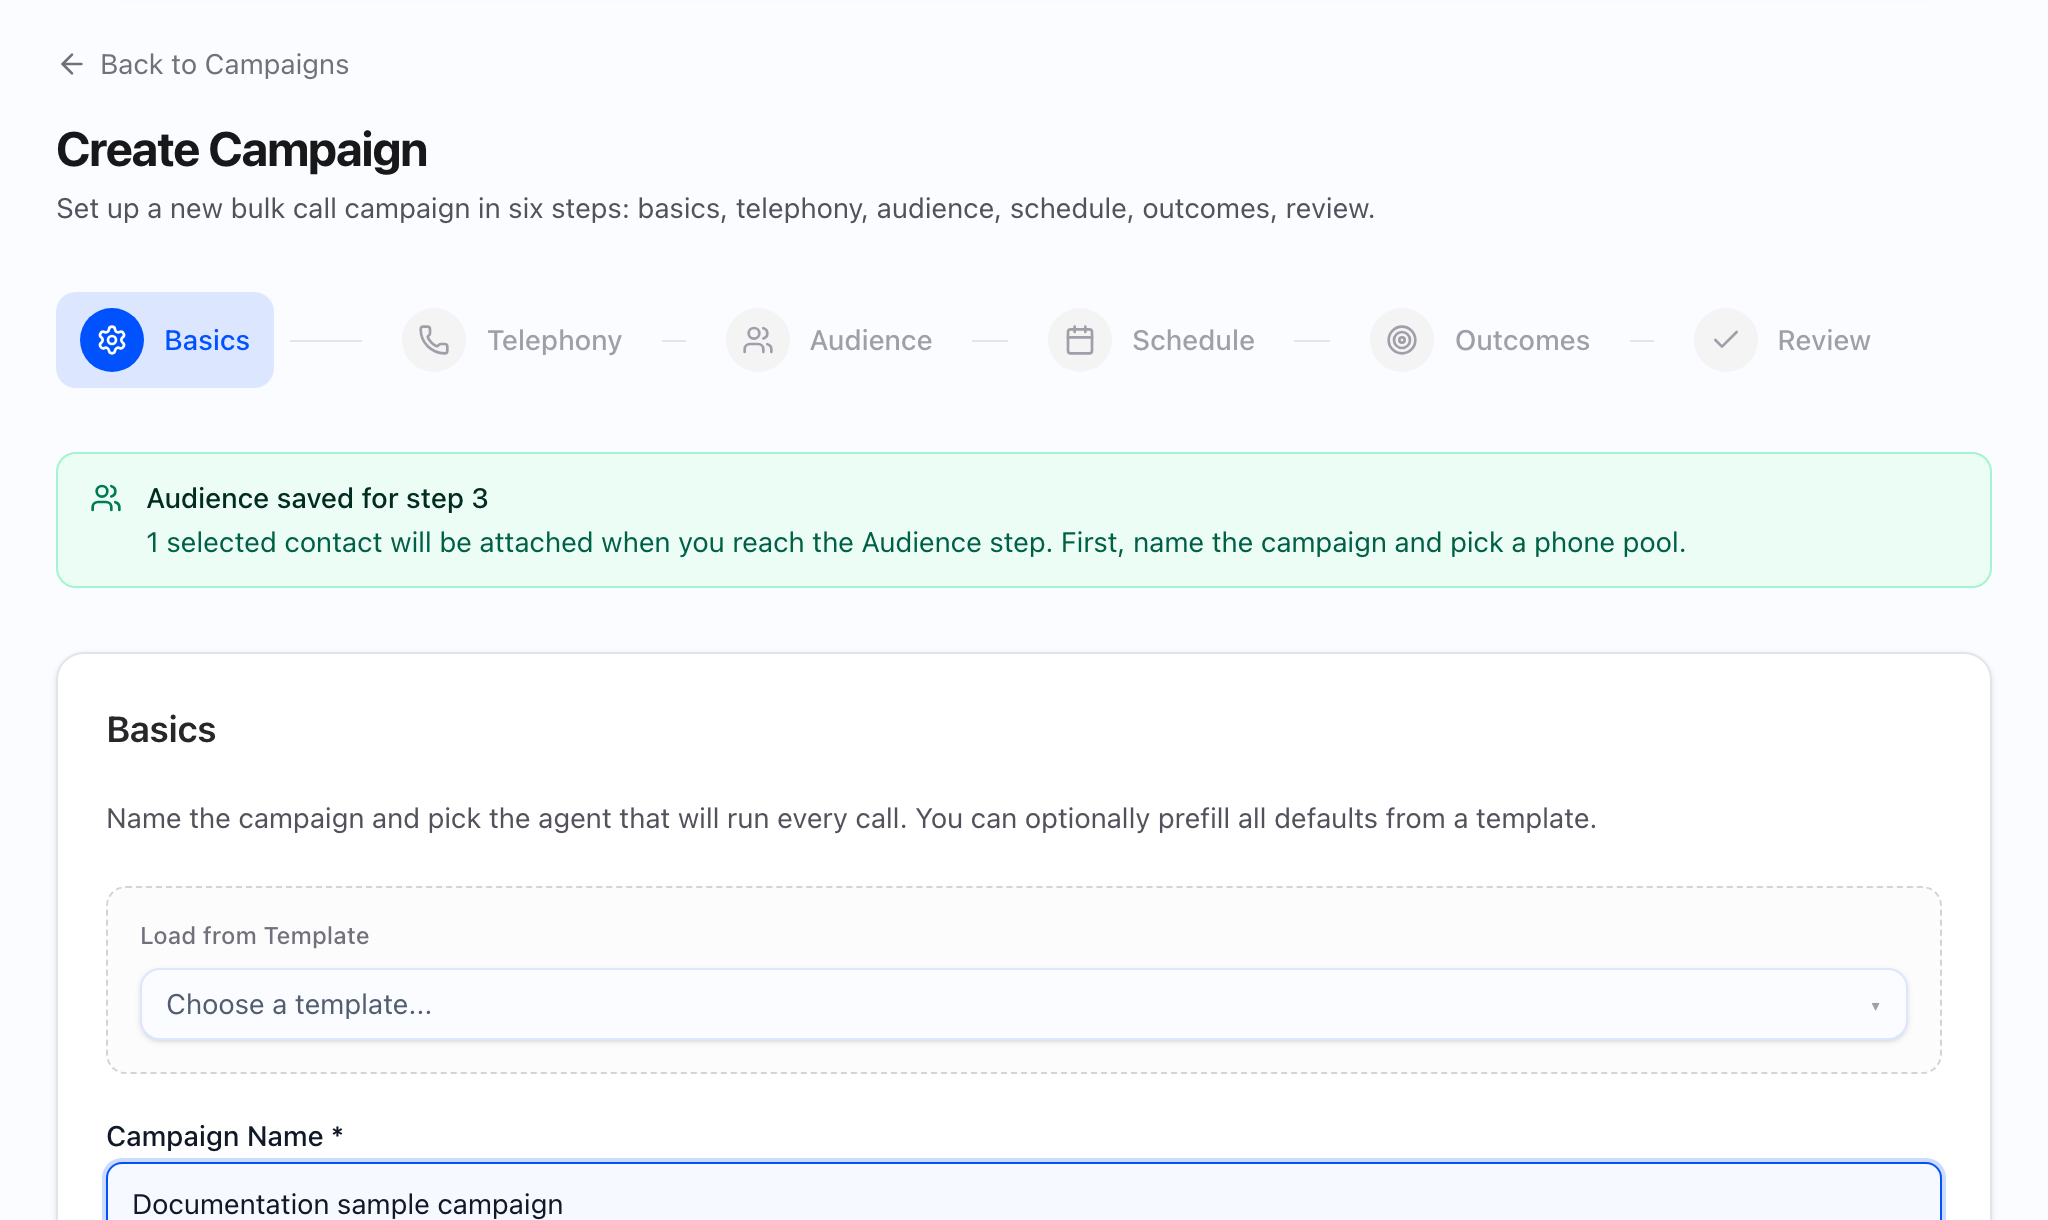
What the static should show: Full Basics step with the stepper highlighting Basics, the intro paragraph, Load from Template, the Campaign Name field (required), and the Agent field (required), plus Previous / Next at the bottom.
At a glance
- Intro copy: “Name the campaign and pick the agent that will run every call. You can optionally prefill all defaults from a template.”
- Load from Template is optional (searchable control: “Choose a template…”, “Search templates…”, empty state “No templates found”).
- Campaign name and Agent are required before Next (see below).
- Helper under Agent: “The agent defines the script, tools, and voice used on every call in this campaign.”
What the GIF should show: Choosing a template and watching agent (and later-step defaults from that template) update; then typing a campaign name and picking an agent from the searchable list.
Load from Template
- Label: Load from Template (small label above the control).
- Selecting a campaign template can prefill later wizard defaults (for example agent, phone numbers, retries, concurrency, timezone, call windows, recording, A/B flags, and dry-run options where the product supports them). It does not set Campaign name in the screen—you still enter a name.
- Changing template while creating applies values from the selected template. Editing an existing draft may limit template-driven changes depending on how the draft was created.
Campaign Name (required)
- Label: Campaign name (required).
- Placeholder: “e.g. Q1 Outreach Campaign”
- Next needs a non-empty name after you trim spaces. There is no extra minimum length on this field in the campaign wizard.
Agent (required)
- Label: Agent (required).
- Searchable control: “Select agent…”, “Search agents…”, empty “No agents found”.
- Next needs a selected agent.
- The list comes from the agents available in your workspace (search and paging behave like other searchable pickers in the app).
What blocks Next
Next stays disabled until:
- Campaign name is filled in (not only spaces).
- Agent is selected.
Completed steps in the stepper can be clicked to go back; future steps stay disabled until you advance.
What the video should show: End-to-end: open Create campaign, optional template, fill name and agent, click Next, and confirm the stepper moves to Telephony.
Common mistakes
- Skipping the name after using a template—templates do not fill Campaign name.
- Wrong agent for the list you will attach in Step 3—variable mapping and scripts follow the agent you choose here.