Import Contacts From Csv
After Start import succeeds, the app opens the import status page for that job so you can watch progress, preview problems, and download an error file when the product offers it. For what each control means, see Import history and error reports.
At a glance
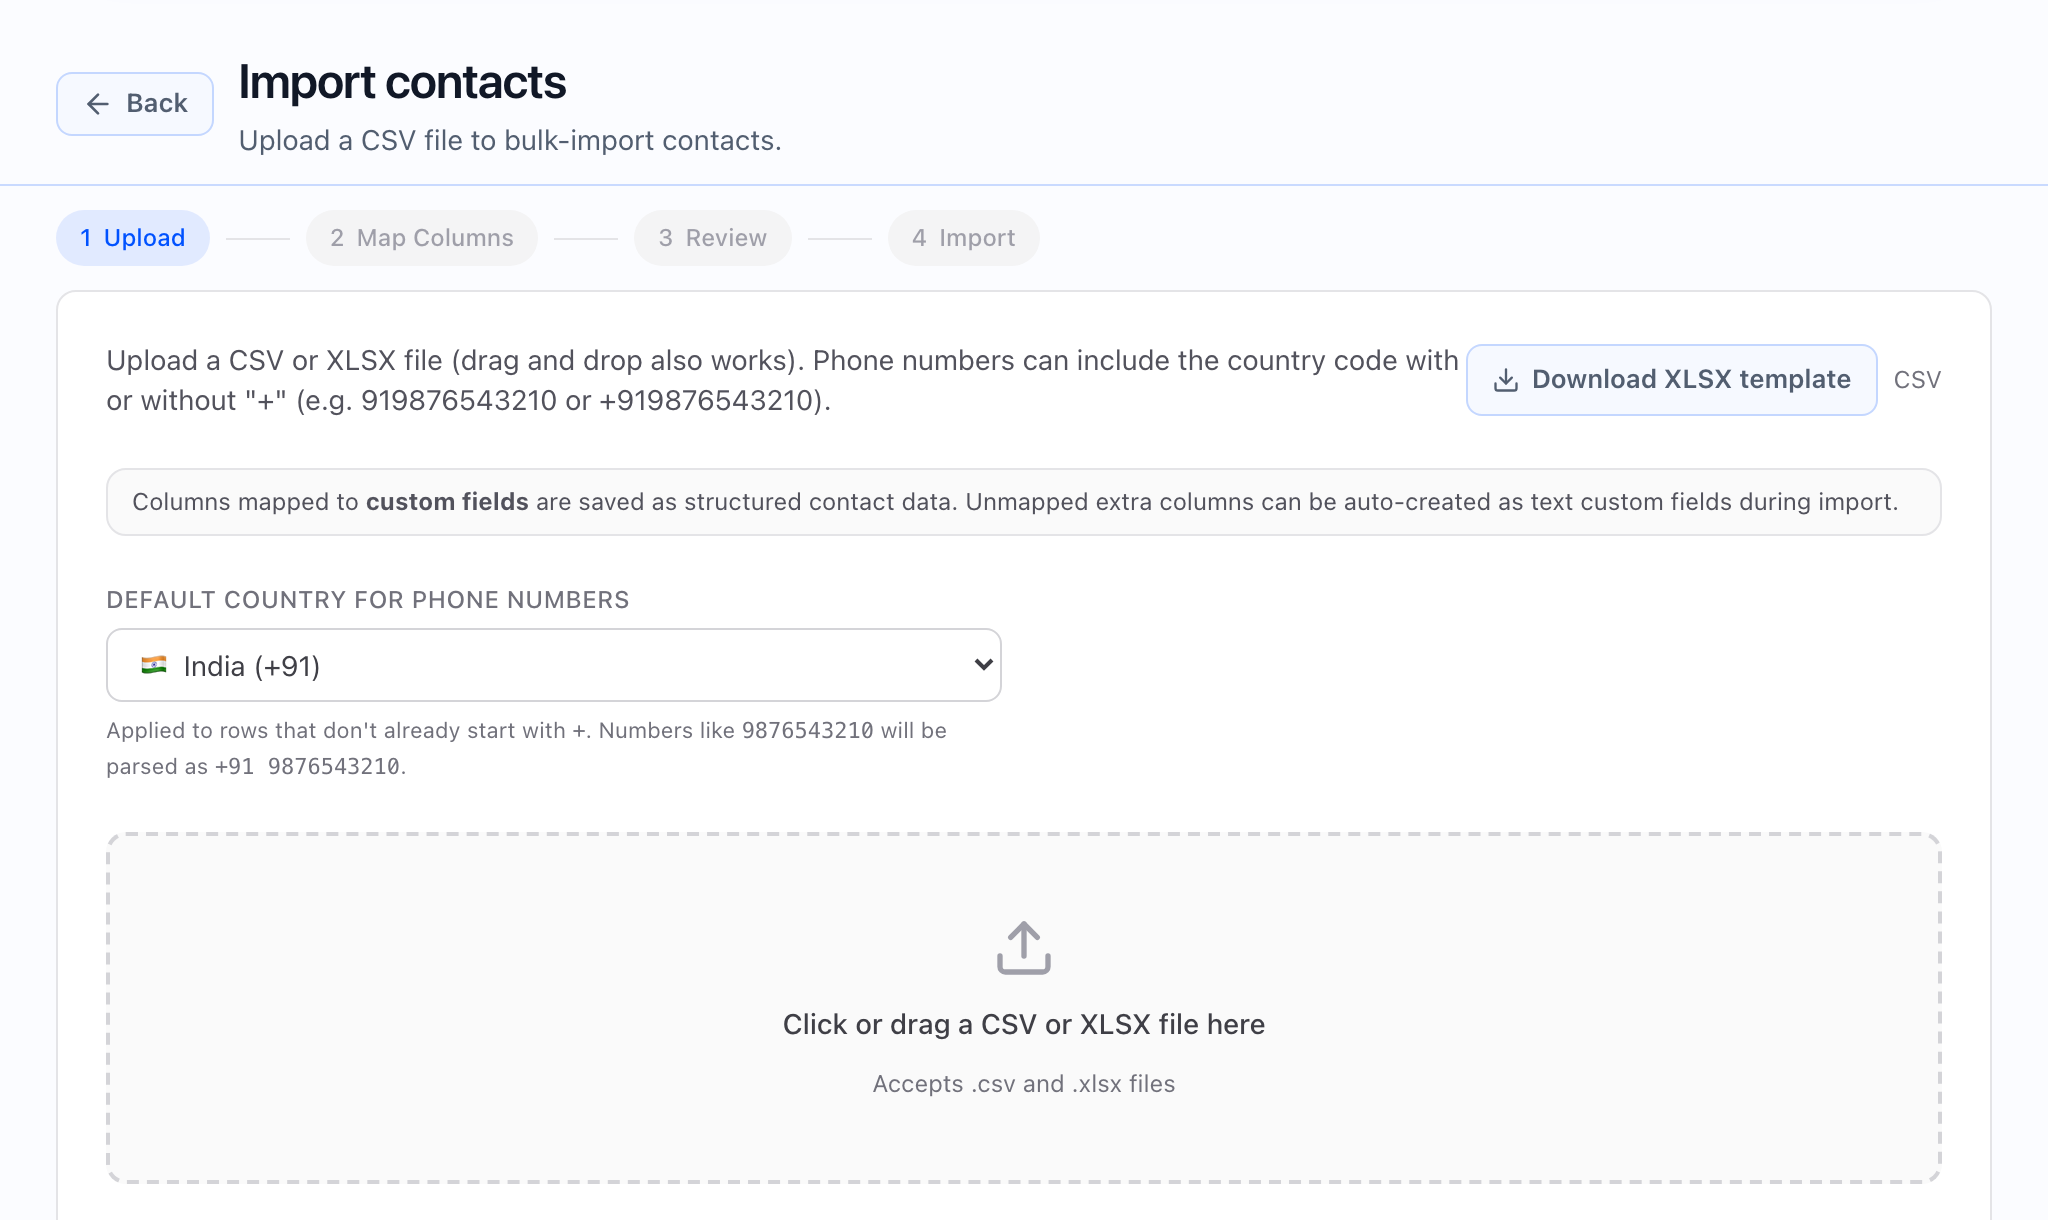
- Steps in the stepper: 1 Upload → 2 Map Columns → 3 Review → 4 Import (the labels match what you see on screen).
- In Map Columns, each column can map to a standard field, -- Skip --, or a (custom) field from your tenant. Phone is required; other targets include first name, last name, email, company, tags, timezone, and your custom field definitions.
- You must have a workspace (tenant) selected in the header. If it is missing, the app shows a message like Select a tenant to import contacts.
Before you start (what to prepare)
- A CSV where each row is one contact.
- At least one column you will map to Phone (required).
- Optional columns for name, email, company, tags, timezone, and custom fields your tenant already defined.
Upload area copy to expect: the app explains that you can upload a CSV or drag and drop it, and that phone numbers may include a country code with or without a leading plus. Use Click or drag a CSV file here when you are ready to pick a file (.csv only).
**Download template** gives you a ready-made CSV named **contacts_template.csv** with the columns the importer expects: phone, first name, last name, email, company, timezone, and one column per custom field. Sample values match types where the app can suggest them.
Step 1 — Upload
The helper text on this step explains that columns you map to custom fields are stored as structured contact data, and that unmapped extra columns can optionally be turned into new text custom fields during the import (see the auto-create option in later steps if it applies).
Next: Map columns stays disabled until a file is selected and the header row is read successfully.
Step 2 — Map Columns
The instructions say: Map each CSV column to a contact field or custom field. The Phone field is required.
For each column, pick a target in the dropdown. The app tries to help by auto-matching common header names to the right field.
- If two columns map to the same target, that row is highlighted in amber and you see a Duplicate message—change one of the targets before you continue.
- If Phone is not mapped, the app shows You must map at least one column to Phone. and Next: Review stays disabled.
- If some columns are still unmapped, you may see an option to auto-create custom fields for those columns in the next steps (wording includes how many columns would be created).
Treat **Duplicate** warnings as blocking: they match the app’s own validation in **Map Columns**—the wizard will not let you move on until you fix them.
Step 3 — Review
Review shows an Import summary with Total rows, how many Mapped fields you have, and Missing phone (highlighted in amber if any rows have no phone after mapping). You will also see a Column mapping list that pairs each file header with the field you chose, plus counts for how many rows will be skipped for missing phone when applicable.
If auto-create is on for unmapped headers, the summary states how many unmapped columns will become new text custom fields.
Step 4 — Import
When you choose Start import, the app shows Importing contacts… while the work runs. If something fails, you may see Import failed and Try again, which takes you back to the review step so you can adjust and resubmit. On success, the app takes you straight to the import status page for that run—there is not a separate “all done” screen in between.
After import starts: stay on the status page the app opened. There you can track progress and use Preview errors or Download errors when the product makes them available. For details, see Import history and error reports.
Auto-create unmapped custom fields (when to use it)
When the checkbox appears, it is labeled to match how many unmapped columns would become new custom fields, for example Auto-create custom fields for N unmapped column(s). Turn it on only if you want those extra columns to create new field definitions. Turn it off if you are cleaning up a messy export and do not want new schema from one-off column names.
What to check after import
- Open Import history and error reports and find the run you care about, or use the import list from More → View import history on the contacts list, then open the same job.
- Confirm Status and the created / updated / skipped counts.
- Open Contacts and spot-check a few records to ensure fields look right.