Uploading Contacts
There is no separate “launch checklist” page in the app (see Campaign launch checklist). Contact uploads for bulk campaigns are centered on the Create campaign flow Audience step and, for drafts tied to a server-side upload, the upload status area on the campaign detail page.
Contact quality drives pickup, reporting, and how painful troubleshooting will be. A clean upload makes the first hours predictable; a messy one creates confusion before the first answered call.
Before you start
- Source file is approved by the campaign owner.
- One row = one contact; merges and notes-in-cells complicate validation.
- Required fields are present (identifier, phone, timezone if schedule is local).
- Consent / suppression policy applied upstream.
- Duplicate policy is decided before import.
Who should own this
- SDR lead: list sourcing and sanity.
- Sales Ops: mapping, import validation, launch readiness.
- Compliance: suppression and consent.
- RevOps / CRM: IDs or fields needed for writeback.
Upload and attach contacts (wizard)
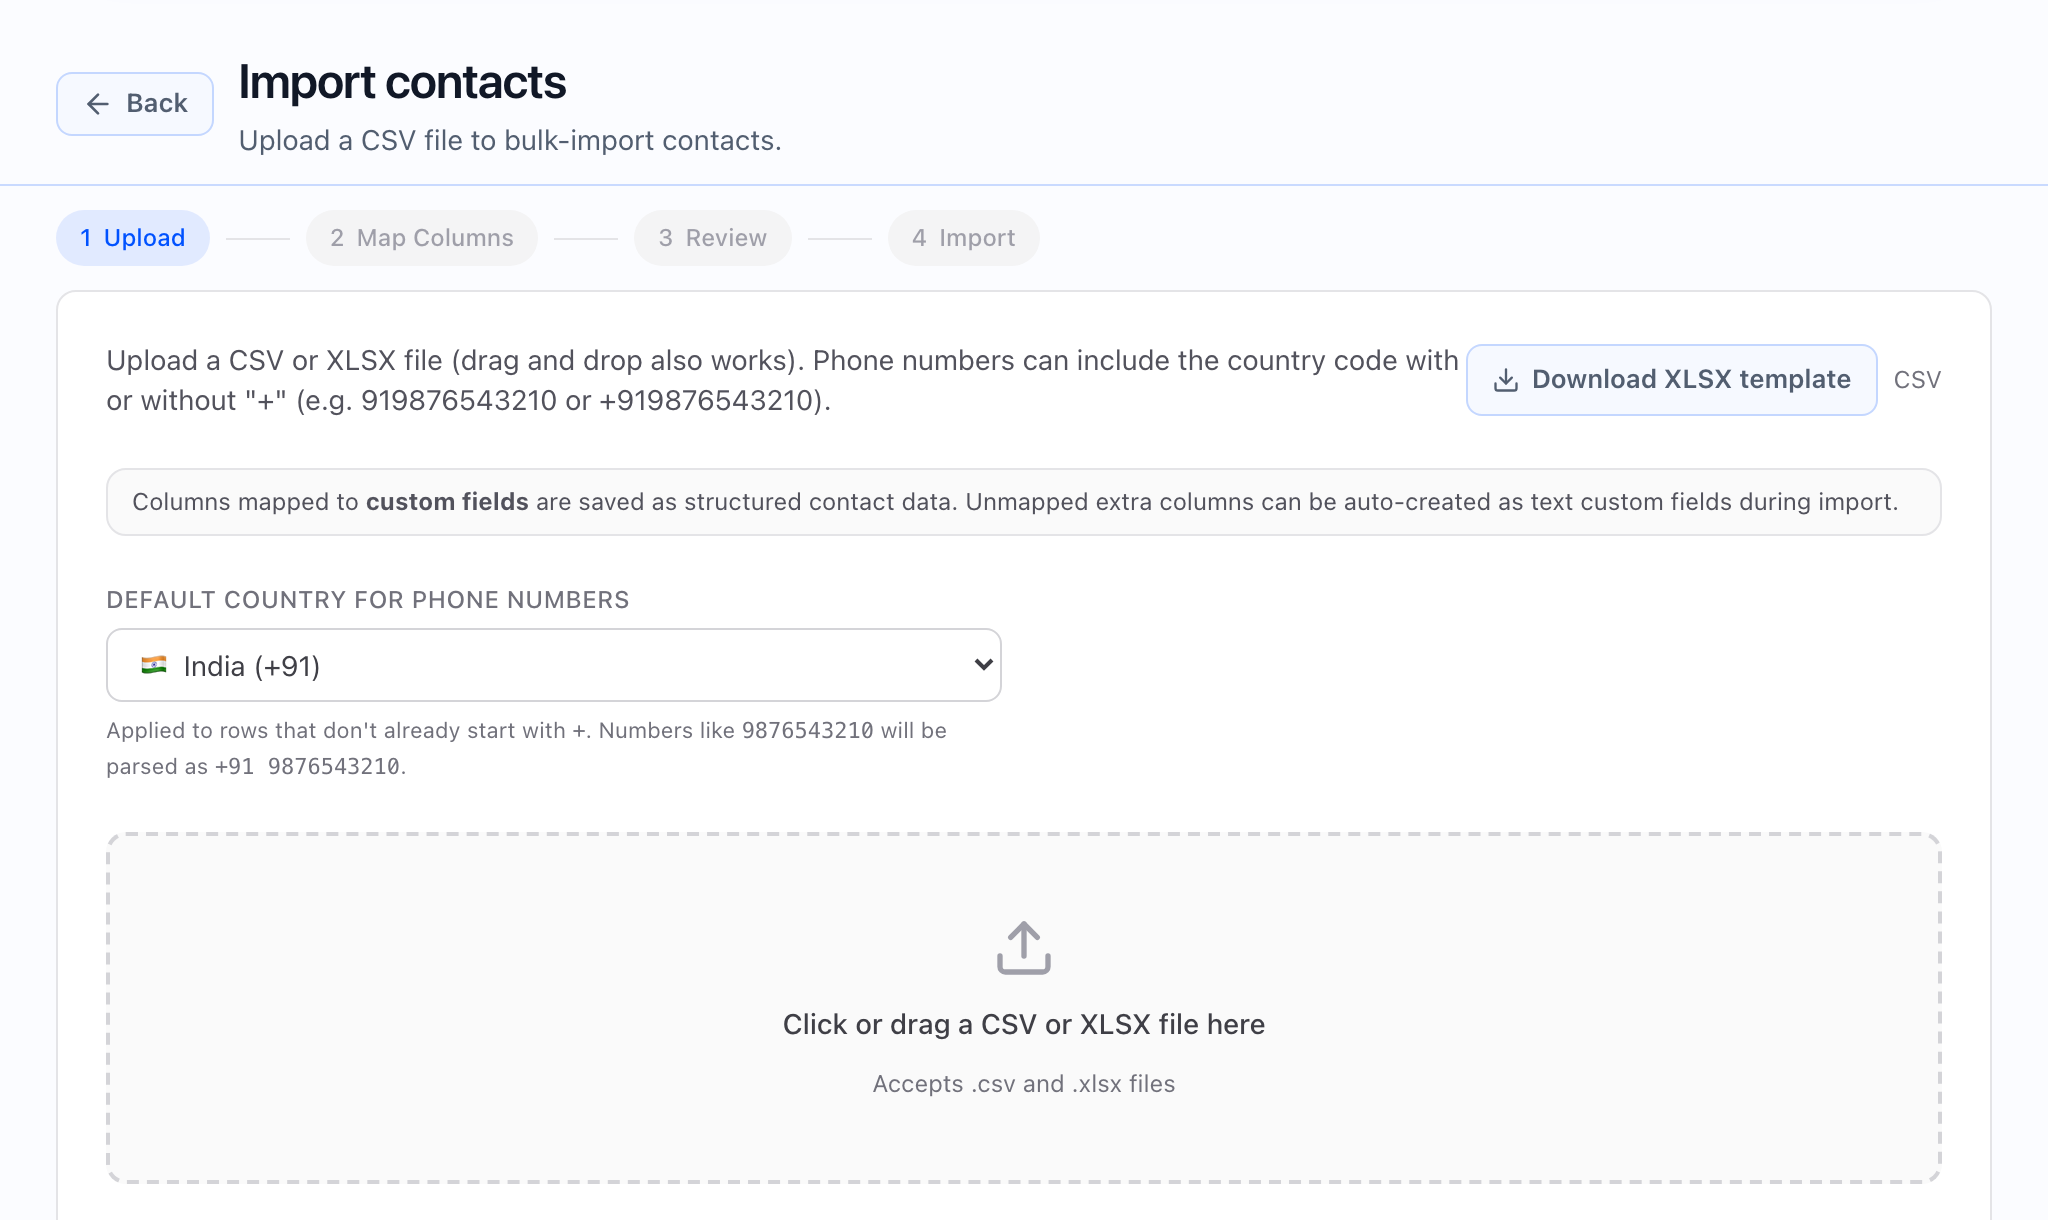
The Audience step in Create campaign (or Edit for a draft) is where you choose CSV, paste contact IDs, or a segment. For new campaigns from CSV, the wizard requires a file before you can go forward. After upload and mapping (as shown in the step), complete later steps and save the draft so the list is attached for dialing.
- Prepare CSV with stable headers and one contact per row.
- Open Create campaign (or Edit from a draft).
- Go to Audience and select CSV; add the file the UI accepts.
- Map columns to Callaro fields; fix sample rows the preview highlights.
- Continue through Schedule and Outcomes; finish Review and save.
- On campaign detail, confirm counts and any upload card match expectations.
Monitor an existing upload (campaign detail)
When the campaign has a bulk upload, the upload section on campaign detail shows status, size, and timestamps as processing completes. Use it to confirm the upload is staged, attached, or consumed as expected before launch, and to reconcile any errors with the choices you made in the wizard.
What the important decisions mean
- Row grain: One dialable contact per row keeps tasks and reporting honest.
- Phone normalization: E.164-friendly data reduces silent skips; see troubleshooting if many tasks fail early.
- Timezone column: Matters when calling windows are local to the contact.
- Duplicates: Decide suppress, split campaigns, or dedupe upstream — do not improvise at launch.
- Segments: If cohorts need different measurement, split campaigns instead of one mixed file.
What good looks like
- Expected import / attach counts match the owner’s plan.
- Rejections are low and explainable.
- Mapping is obvious to the next reviewer without tribal knowledge.
- Successful dials tie back to the right CRM rows and workflows.
Common mistakes and troubleshooting
- Launching while the upload is still processing or in an error state — wait for a clean status on campaign detail and a clear task picture.
- Skipping mapping validation because the file “looked fine” in Excel.
- Mixing segments that need different scripts or numbers — split campaigns.
- Editing the CSV only on disk without re-running the Audience step — the draft must reflect the file you intend to dial.
Final checklist
- Audience step shows the intended source and Next is available when validation passes.
- Campaign detail upload section (if shown) matches status and timing.
- Failed rows are resolved or excluded consciously.
- Owner signs off that the list matches compliance and capacity.